

Table of Contents
- Complete Dental Bridge Care: Expert Advice from Northern Dental in Dawson Creek, BC
- Getting Ready: Essential Preparations for Bridge Cleaning
- Step 1: Gather Your Cleaning Tools
- Step 2: Rinse to Remove Debris
- Step 3: Brush Your Bridge Thoroughly
- Step 4: Floss Under the Bridge with Floss Threaders or Super Floss
Complete Dental Bridge Care: Expert Advice from Northern Dental in Dawson Creek, BC
Proper dental bridge cleaning and maintenance is vital to keep the bridge stable, prevent decay around the supporting teeth, and avoid gum irritation. At Northern Dental in Dawson Creek, our team provides personalized guidance on bridge care and restorative services. We’re happy to welcome you to this comprehensive guide on everything you need to know about caring for your dental bridge. In the following pages, we explain why consistent cleaning extends the life of your restoration and protects your adjacent teeth. When you build a simple routine, you can easily maintain a clean and comfortable bridge. Consistent care also catches early signs of wear, helping you avoid more complex treatments down the road. Our Dawson Creek team is always available to answer your questions and tailor a plan to your needs. We invite you to visit us today so we can assess your bridge and demonstrate the techniques in person.
Key Takeaways
- With proper daily care, it can last a decade or longer.
- Rinsing your dental bridge under lukewarm running water is an essential step before brushing.
- Flossing underneath a dental bridge is essential because a brush cannot reach the gumline below the pontic.
- A Waterpik water flosser provides an effective flush under a dental bridge, reaching the narrow space where the bridge meets the gum that floss alone may leave behind.
- After you’ve cleaned beneath your bridge, interdental brushes are the next tool for reaching the sides and crevices around the bridge and abutments.
Getting Ready: Essential Preparations for Bridge Cleaning
With proper daily care, it can last a decade or longer. Getting ready for your cleaning, even before you pick up a toothbrush, makes the process safer and more effective. A few minutes of simple preparation helps you avoid missing a step and reduces the risk of accidentally damaging the bridge.
Start by clearing a small area on your countertop or sink so you can lay out your supplies without clutter. Wash your hands to keep everything hygienic, and make sure you have good lighting so you can see all surfaces of the bridge. Choose a time when you won’t feel rushed, such as right after your nightly brushing and flossing routine. If you’re ever unsure about what material your bridge is made from (porcelain, metal, or composite), ask us at Northern Dental so you can select the safest tools for your specific restoration.
Taking just a minute to set up each evening reduces the chance of skipping a step or using improper technique. This steady routine keeps your bridge looking natural and feeling secure for years.
Once you have a clean space and a few minutes set aside, you’re ready to collect your cleaning supplies and begin. With these simple preparations, your cleaning session will be efficient and worry-free.
Step 1: Gather Your Cleaning Tools
Now that you’re ready with the preparation steps, we recommend gathering the tools for cleaning your dental bridge. Having everything within reach makes the routine easier and helps extend the life of your bridge.
- A soft-bristle toothbrush, manual or electric, cleans the bridge without scratching its surface.
- A floss threader or dental tape slips under the bridge to remove plaque from hard-to-reach areas.
- An interdental brush (proxy brush) fits between the bridge and gumline to dislodge trapped food particles.
- A water flosser is optional but useful for flushing out debris with a gentle stream of water.
- Antimicrobial mouthwash used as a final rinse helps reduce bacteria and freshen breath.
- A towel and a cup of water nearby keep you comfortable and make rinsing convenient.
After you’ve assembled these items, you’ll be ready to start by rinsing your bridge with water to remove loose debris before moving on to the more detailed cleaning.
Step 2: Rinse to Remove Debris
Rinsing your dental bridge under lukewarm running water is an essential step before brushing. We recommend holding the bridge firmly and angling the water stream toward its underside and around the abutment teeth to dislodge hidden debris. A gentle flow of water can flush away particles that would otherwise scratch the restoration during brushing. Lukewarm water is gentle and effective, preventing thermal shock that could compromise the bridge’s fit.
If you have a water flosser, it can be especially helpful for cleaning underneath the pontic. Point the flosser tip carefully and use a low pressure setting to avoid irritating your gums. Avoid hot water, as extreme temperatures may damage the bridge material over time. Rinsing thoroughly before brushing minimizes the risk of abrasion and keeps the bridge surface smooth. If stubborn debris remains, repeating the rinse for a few seconds can make a difference. Once your bridge is debris-free, it’s time to brush it thoroughly.
Step 3: Brush Your Bridge Thoroughly
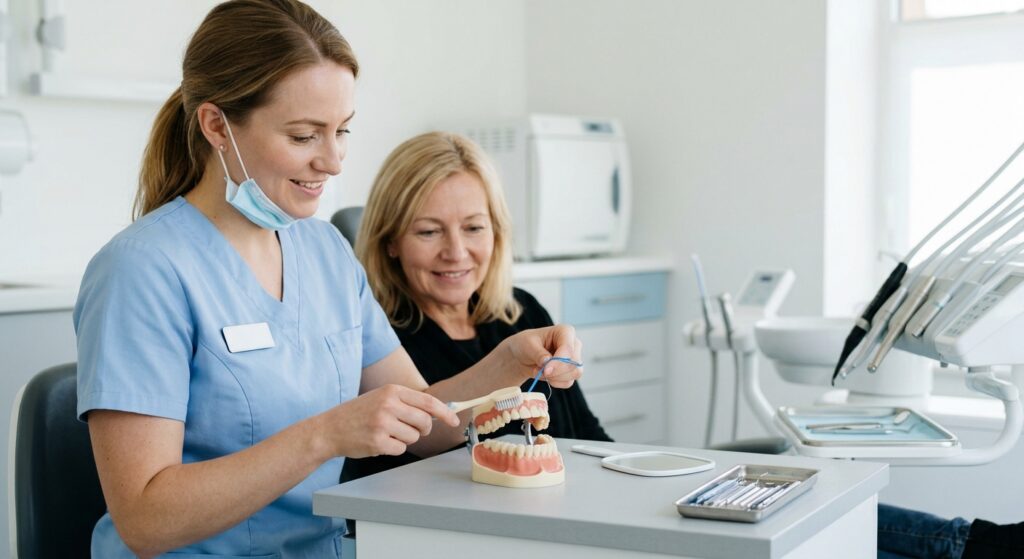
Once you have rinsed away loose food particles, it is time to brush your bridge thoroughly. Hold your brush at a 45-degree angle to the gum line and use gentle circular motions across all surfaces—the outer side, inner side, and chewing surface of each artificial tooth. Spend a little extra time where the bridge meets your natural gums, since plaque collects easily in that space.
We recommend a soft-bristled toothbrush to avoid scratching the bridge material, paired with a non-abrasive toothpaste that preserves the finish. Do not forget your natural anchor teeth (abutments) that support the bridge: they need the same thorough brushing to prevent decay. Take care to clean the gum line around them as well—this helps keep the supporting tissue healthy. Regular, thorough brushing is key to a long-lasting bridge and a healthy mouth.
With the bridge brushed clean, the next step is to floss under it to remove plaque from the areas your brush cannot reach.
Step 4: Floss Under the Bridge with Floss Threaders or Super Floss
Flossing underneath a dental bridge is essential because a brush cannot reach the gumline below the pontic.
We thread a piece of floss through the loop, then gently guide the threader under the bridge from the cheek side toward the tongue. After pulling the floss through, we wrap it in a C-shape around the adjacent tooth and slide it up and down, avoiding any snapping motion.
Super floss is a pre-cut strand with a stiff end, a spongy middle section, and regular floss on one side. We thread the stiff end under the bridge first, then use a gentle sawing motion to clean the spongy portion back and forth beneath the pontic.
We always use a clean section of floss for each gap and never snap the floss against the gums. Flossing under the bridge once daily is typically enough to help prevent gum disease around the abutment teeth.
Step 5: Clean Underneath the Bridge with a Waterpik
A Waterpik water flosser provides an effective flush under a dental bridge, reaching the narrow space where the bridge meets the gum that floss alone may leave behind. We suggest starting by filling the reservoir with lukewarm water and setting the pressure dial to the lowest level to keep the experience comfortable. Attach the cleaning tip and position it at the gum line, angling the stream toward the bridge margin. Trace the gum-bridge junction along the outer side, pausing briefly between each tooth to let the water lift out debris, then repeat the same motion along the inner surface. The pulsing flow is gentle enough not to irritate healthy gums. As you get used to the sensation, you can gradually increase the water pressure; always point the tip away from the gum tissue to avoid discomfort. Once you have flushed both sides thoroughly, interdental brushes offer a final, targeted clean around any remaining tight spots.
Step 6: Use Interdental Brushes for Hard-to-Reach Areas
After you’ve cleaned beneath your bridge, interdental brushes are the next tool for reaching the sides and crevices around the bridge and abutments. To use one, gently insert the brush between the bridge and the gumline or between the bridge and your natural teeth, moving it back and forth to dislodge plaque and food particles. Never force it: if it doesn’t slide easily, a smaller size is the better choice. Choosing the right size is key: the brush should slide in with slight resistance. A brush that slips in too easily won’t clean effectively, while one that feels tight can damage the bridge or gums. We recommend using an interdental brush once a day, ideally as part of your bridge-cleaning routine. Once you’ve finished with the brush, rinse with an antibacterial mouthwash to wash away any loosened debris.
Step 7: Finish with an Antibacterial Mouthwash
Swishing with an antibacterial mouthwash at the end of your daily routine helps eliminate bacteria that accumulate around a dental bridge.
We recommend choosing an alcohol-free formula to avoid irritation. Swish the rinse vigorously around your bridge and along the gumline for the time listed on the label—typically 30 seconds—to reach every surface. This final rinse flushes away debris dislodged during brushing and flossing, adding an extra layer of protection against bacteria. It also helps keep the gum tissue around your bridge healthy by reducing the bacterial load.
Make it a once-daily habit: after cleaning your bridge, finish with the mouthwash, then avoid rinsing with water so the active ingredients can keep working overnight. This final step targets the microscopic bacteria that can linger after brushing and flossing alone.
Even a thorough routine can occasionally encounter cleaning challenges around a bridge, and understanding common difficulties helps you stay ahead of them.
Common Challenges with Bridge Cleaning and How to Overcome Them
Even after following a daily oral care routine, many people find that keeping a dental bridge clean presents unique hurdles. Bridges create small spaces where food debris, plaque, and bacteria can hide, leading to bad breath or gum irritation if not cleared away. The good news is that a few simple tools and technique adjustments make bridge hygiene straightforward.
Food and debris tend to collect between the bridge base and the gum tissue. A floss threader or superfloss can be guided underneath the bridge to remove lodged particles and wipe the area clean.
Plaque buildup on the underside of the bridge is another common issue. An interdental brush, with its tiny tapered bristles, easily reaches the abutment teeth and clears plaque from the bridge’s hidden contours.
Ordinary floss often cannot get beneath a fixed bridge, but a water flosser (oral irrigator) directs a stream of water into those tight spaces and flushes out food and bacteria effectively.
Using a hard-bristled toothbrush or aggressive scrubbing can scratch the bridge surface or loosen the cement. We recommend a soft-bristle brush with gentle circular motions to protect both the bridge and surrounding gums.
Persistent bad breath or gum inflammation around a bridge may be a sign that some areas are not being cleaned completely. When those symptoms appear, we encourage you to schedule a checkup at our Dawson Creek clinic for a professional assessment and deep cleaning.
Addressing these everyday cleaning obstacles helps you avoid damage and maintain a healthy bridge for years to come.
Protecting Your Investment: Long-Term Bridge Maintenance Tips
To protect your investment, proper dental bridge cleaning and maintenance is essential for lasting comfort and oral health.
Brushing gently twice a day around the bridge and flossing beneath it with a specialized tool or floss threader removes plaque and debris that can lead to gum irritation.

Regular professional exams also play a key role. We check the bridge fit and monitor gum health to catch minor issues before they become major concerns. We encourage you to speak with your dentist about a personalized maintenance plan that suits your bridge type and oral care routine. In Dawson Creek, our team is ready to help you protect your bridge.
With diligent daily habits and professional support, your dental bridge remains a valuable, long-lasting investment and a confident smile.
Begin Your Daily Bridge Care
You now have a complete step-by-step routine to clean and maintain your dental bridge, from gathering the right tools to using a water flosser and interdental brushes. Following these steps every day helps protect your investment and keeps your smile healthy. If you run into any challenges like persistent bad breath or gum irritation, our team is here to help. Our team in Dawson Creek can assess your bridge fit and provide personalized advice. Consistent home care together with regular professional check-ups is the best way to ensure your bridge lasts. Take the first step today by putting this guide into practice and scheduling a check-up if you have concerns.
